Synchronizing sound and preparing the video files with DaVinci Resolve
= Preliminary =
We have configured all devices so that they record at 30fps, 1080p, and in HEVC format (except the 360 camera but you have exported 1080p/HEVC medias from insta360 studio). See the tutorial for the mevo cameras, and the one for the DJI cameras.
All sound recorders should record at 48KHz (see tutorial).
If Resolve is not able to import a “mkv” video file (which is just a container but doesn’t imply anything about the video codec or format), just rename its extension to “avi” instead of transcoding or anything.
First check that all your media at 1080p, HEVC, 30fps, 48KHz.
If required, the easiest way to transcode/convert if to use VLC !
For example go to the File menu of VLC -> convert / save -> small arrow to select “convert” -> Audio - CD -> click on the wrench to select “48000hz” in the "audio codec “tab”
= 1 - The EDIT tab =
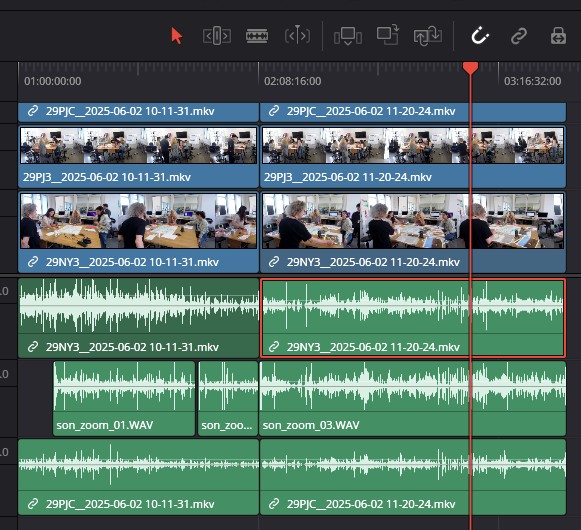
- Load all your files
- Arrange your files in the timeline as follows : create one track for each viewing angle, and put the files chronologically
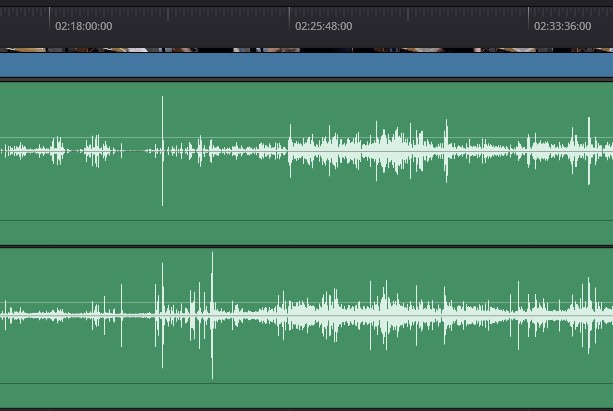
- Fig 1 - Change the audio gains (by dragging the vertical light gray line on the waveform) so that the amplitude of each waveform is big enough and visually roughly the same as the others
- Search a zone in the audio waveform that is really particular (voice, impacts, events, silences, etc.)
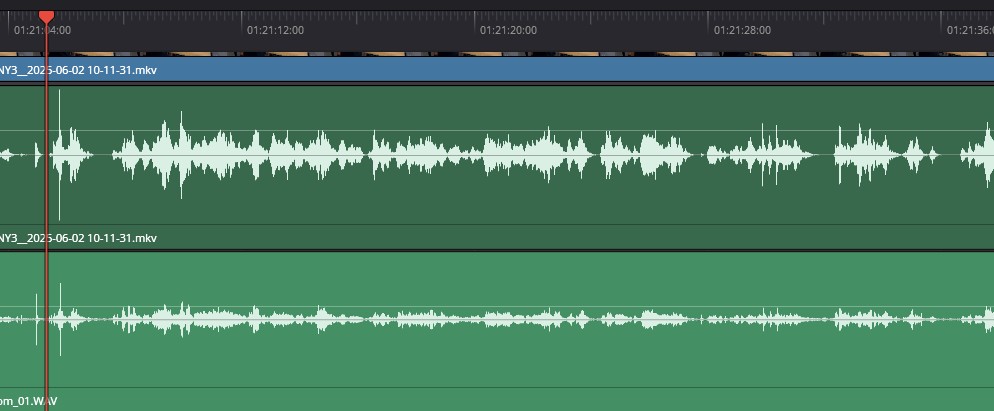
- Fig 2 - Visually find audio events that are the same in all your waveforms
- Manually synchronize them by dragging the files (and progressively zooming to the maximum possible zoom, because for sound, even some frames of difference are easy to detect)
- Now all your video sequences are chronologically arranged and temporally synchronized, so you can unlink the video media from the audio media (by right-clicking on each sequence) and remove all the audio files that you don’t need anymore
= 2 - The FAIRLIGHT tab (sound processing) =
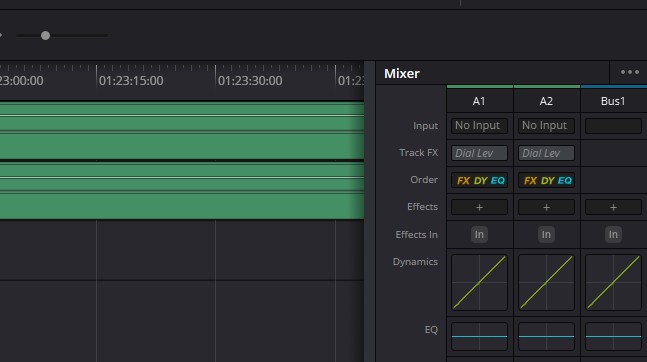
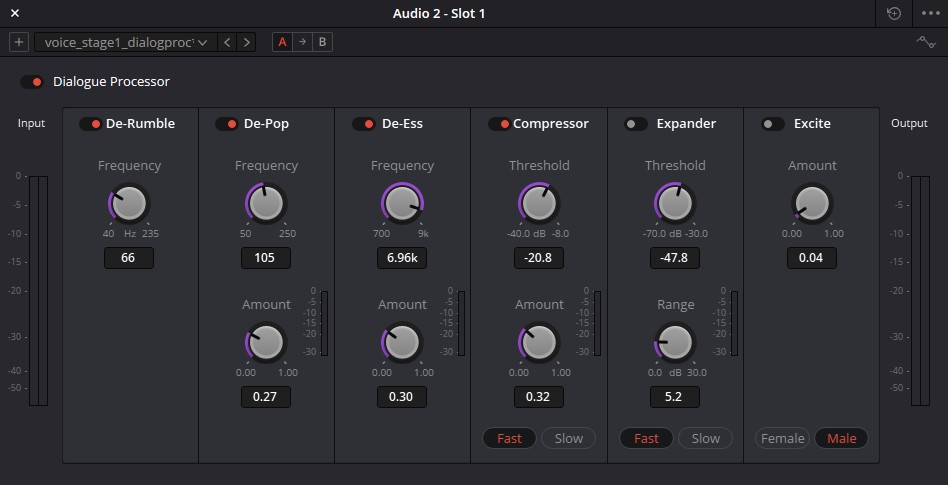
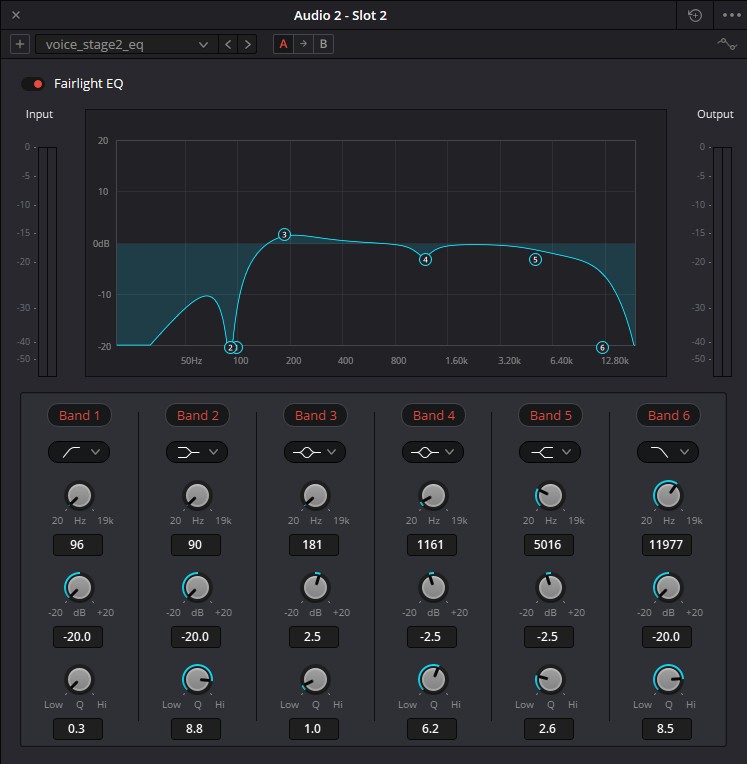
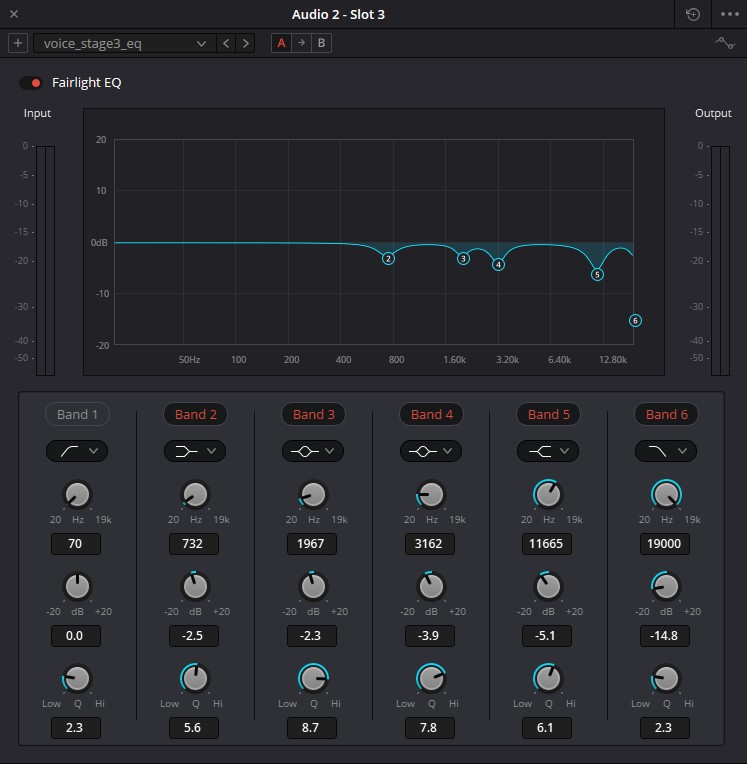
- For all the audio track you’ve kept, in the fairlight tab, go to the mixer (bottom-right corner) and in the “track FX” zone, add 4 effects : dialogue processor, fairlight EQ, another fairlight EQ, Gain
- For each effect, load the template provided with this tutorial
- If required, arrange the “gain” effect in the end
- When video and sound are synchronized and the sound corresponds to what you wanted, remove all extra tracks
= 3 - The DELIVER tab (export) =
This is were you choose the parameters of your exports, put them in the queue, and start the export queue.
We generally use h265, 1080p, and AAC for sound.
Export will take around 15min per hour on the Observation Lab laptops.
You should not put the quality to the maximum then use another external converter (such as handbrake) because those software are much slower then the export function of Resolve.